Pin It
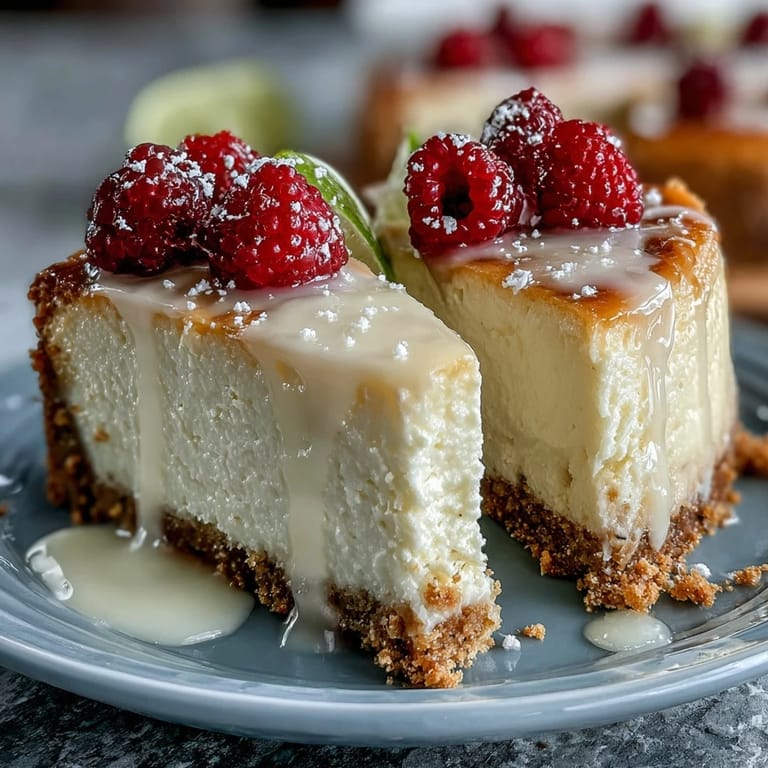
 Last spring, my neighbor brought over a jar of something that looked like edible art—layers of buttery crust, cloud-soft filling, and glossy lemon curd catching the afternoon light. One spoonful and I was completely charmed. She mentioned it took her twenty minutes to assemble, and I realized this was the kind of dessert that makes you look like you've spent hours in the kitchen when really you've just been smart about it.
I made these for a potluck where everyone showed up with cookies or brownies, and there was something quietly satisfying about pulling out six gleaming jars from my cooler. Someone asked for the recipe right there on the grass, pen in hand. That's when I knew this was officially becoming my thing.
Ingredients
- Graham cracker crumbs: These form the foundation—buy them pre-crushed if you want to save two minutes, or crumble a sleeve of crackers yourself and feel very capable.
- Unsalted butter, melted: Melted butter binds everything into that perfect sandy texture that holds together without being dense.
- Granulated sugar: Just a couple tablespoons sweetens the crust enough that it doesn't taste bland beneath the filling.
- Heavy whipping cream, cold: Coldness matters here—it whips faster and holds peaks better, giving you that cloud-like texture.
- Cream cheese, softened: Room temperature cream cheese mixes smoothly without lumps; cold cream cheese will fight you every step of the way.
- Powdered sugar: It dissolves faster than granulated sugar in the filling, creating that silky mouthfeel.
- Fresh lemon juice: Bottled juice works in a pinch, but fresh lemon juice tastes brighter and less metallic—the difference is real.
- Lemon zest: This is where the actual lemon flavor lives; don't skip it or your cheesecake will taste suspiciously mild.
- Pure vanilla extract: A small amount deepens the lemon flavor rather than fighting against it.
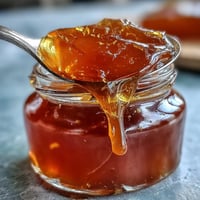
- Lemon curd: The glossy topping that makes these look bakery-worthy and tastes like concentrated sunshine.
- Fresh berries: Raspberries and blueberries add tartness and color, but honestly, whatever's in season works beautifully.
Tired of Takeout? 🥡
Get 10 meals you can make faster than delivery arrives. Seriously.
One email. No spam. Unsubscribe anytime.
Instructions
- Make the crust mixture:
- Combine graham cracker crumbs, melted butter, sugar, and salt in a bowl and stir until it looks like wet sand—this usually takes about a minute. The butter should coat every crumb evenly without creating a paste.
- Press into jars:
- Spoon about two tablespoons of the mixture into each jar and press down firmly with the back of a spoon, creating a compact, even layer. This is your foundation, so don't rush it.
- Whip the cream:
- Pour cold heavy cream into a bowl and beat with an electric mixer on medium-high speed until stiff peaks form—you're looking for that moment when the cream goes from floppy to sculptural. This usually takes three to four minutes depending on your mixer.
- Prepare the filling base:
- Beat softened cream cheese until completely smooth, then add powdered sugar, lemon juice, lemon zest, and vanilla extract and mix until creamy and no lumps remain. The mixture should taste bracingly lemony at this point.
- Fold together:
- Gently fold the whipped cream into the cream cheese mixture using a spatula, moving slowly and turning the bowl as you fold to avoid deflating all those air bubbles you just created. Stop when no streaks of cream remain—the whole thing should feel light and airy.
- Layer the filling:
- Spoon or pipe the cheesecake filling evenly over the crust layer in each jar, filling them nearly to the top. Piping makes it look fancier, but a spoon works just fine if that's what you have.
- Top and chill:
- Add a generous spoonful of lemon curd to each jar, cover them, and refrigerate for at least two hours until the filling is set and cold. The wait is the hardest part.
- Garnish before serving:
- Top each jar with fresh berries and a pinch of extra lemon zest if you're feeling fancy. This is when they really earn their place on a dessert table.
 Pin It
 There's something almost magical about serving these straight from the fridge on a warm afternoon—the way the cold, tangy filling practically melts on your tongue while the bright lemon flavor cuts through the richness. My sister asked me to make them for her book club, and I realized this dessert had quietly become the thing people ask me to bring.
Why Individual Jars Are a Game Changer
Serving dessert in jars does something unexpected—it makes people feel special and removes all the awkward slicing drama. There's also something about eating directly from a jar with a spoon that feels simultaneously elegant and low-key, which somehow makes the dessert taste better. Plus, if someone wants seconds, they just grab another jar; no math required.
The Lemon Factor
Lemon is tricky because too little tastes bland and too much tastes like cleaning supplies. This recipe balances it perfectly: the fresh juice and zest in the filling provide brightness, while the lemon curd on top adds richness and visual appeal without tipping into overwhelmingly sour territory. If you taste the filling mixture before chilling and it seems too lemony, remember that cold flavors taste less intense—trust the process.
Storage and Make-Ahead Magic
These jars are genuinely better when made ahead, which is why they're perfect for entertaining. They keep beautifully in the refrigerator for up to three days, and you can assemble them that morning without stress. The flavors actually settle and meld more harmoniously over time, making your advance planning not just convenient but actually superior to serving them immediately.
- Cover the jars tightly to keep them from absorbing refrigerator smells or drying out.
- Transport them carefully—they're sturdy enough for a short car ride but don't toss them around.
- Remove them from the fridge about five minutes before serving if you prefer them slightly less cold and creamier.
 Pin It
 These jars have become my go-to when I need something that feels thoughtful but doesn't demand hours of labor. They're the kind of dessert that makes you feel accomplished without actually stressing you out.
Recipe FAQs
- → How do I achieve a firm crust for the cheesecake jars?
Combine graham cracker crumbs with melted butter and sugar, pressing firmly into the jars to create a compact base that sets properly during chilling.
- → Can I substitute the cream cheese with another dairy product?
Yes, mascarpone can be used for a richer and slightly sweeter filling while maintaining a smooth texture.
- → What’s the best way to fold the whipped cream into the lemon mixture?
Gently fold the whipped cream with a spatula using slow, sweeping motions to preserve the light, fluffy texture without deflating it.
- → How long should the jars chill before serving?
Refrigerate for at least 2 hours to allow the layers to set fully and develop a creamy consistency.
- → Are there gluten-free options for the crust?
Yes, using certified gluten-free graham cracker crumbs or cookies ensures a gluten-free crust while retaining the crunchy texture.