 Pin It
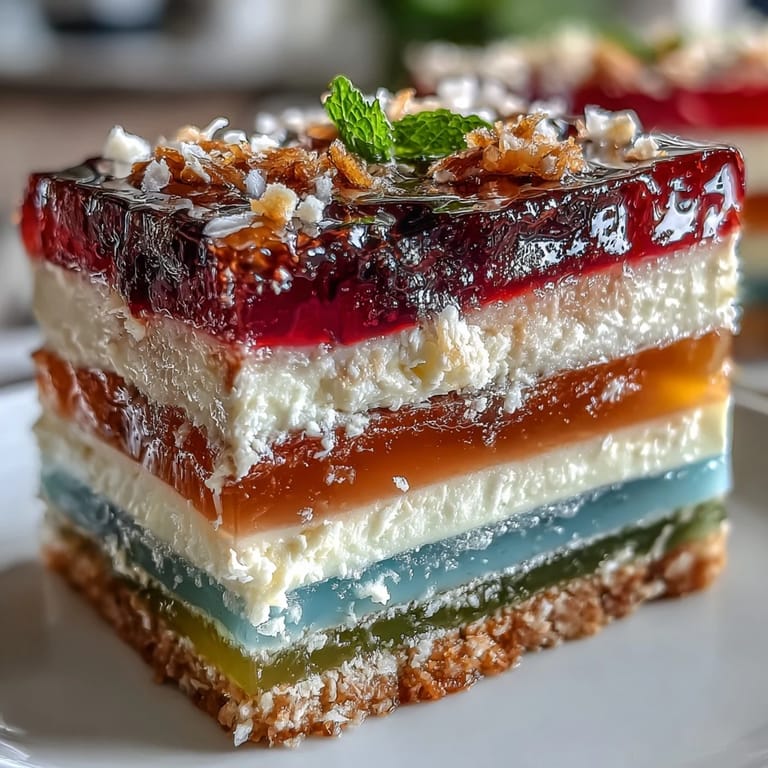
 Layering vibrant colors and flavors, the Agar-Agar Rainbow Jelly Cake with Coconut Cream is a celebration on a plate. It bursts with summer’s joyful spirit, reminiscent of sunny afternoons spent crafting desserts with family under a bright blue sky. The simple process of creating colored jelly layers was like being a child again, marveling at how each hue dances in the light. Coconut cream adds a creamy twist, reminiscent of tropical vacations barely remembered. This dessert transforms any gathering into a festive occasion, and every bite is a refreshing reminder of summer bliss.
One of my fondest memories of making this jelly cake was the laughter that filled the kitchen as my little niece tried to mix the colors, accidentally creating a few unique shades. We ended up with a rather chaotic, but equally delightful, rainbow jelly that tasted just as good as it looked. Family gatherings were never quite the same after we introduced this fun and colorful dessert; everyone wanted a slice of my rainbow dream.
Ingredients
- 2 liters water: This is the base of your jelly, so ensure it’s fresh for the best flavor.
- 16 g agar-agar powder: This plant-based gelatin is perfect for creating that signature jelly texture.
- 400 g granulated sugar: Sweetness is key; adjust based on your fruit juice choices.
- 1/2 teaspoon vanilla extract: Adds a subtle warmth and enhances the flavor.
- Gel food coloring: Go for gel over liquid for vibrant colors that won’t dilute the taste.
- 1/2 cup fruit juice per color: This optional addition gives a natural fruitiness that pairs beautifully.
- 400 ml coconut milk: Rich and creamy, it’s essential for that indulgent coconut layer.
- 4 g agar-agar powder: Used again here, it’ll help set the coconut layer.
- 40 g granulated sugar: Just a touch to balance the creaminess.
- Pinch of salt: Enhances the overall flavors.
Tired of Takeout? 🥡
Get 10 meals you can make faster than delivery arrives. Seriously.
One email. No spam. Unsubscribe anytime.
Instructions
- Prepare the Jelly Base:
- Combine 2 liters of water and 16 g agar-agar powder in a large saucepan, bringing it to a boil while stirring until dissolved. Add 400 g sugar and continue stirring until it melts into the mixture, then remove from heat and add vanilla.
- Divide and Color Jelly:
- Evenly separate the agar-agar solution into six bowls, keeping them warm to avoid setting too soon. In each bowl, mix in drops of food coloring to create a rainbow effect, adding 1/2 cup of fruit juice for extra flavor if desired.
- Assemble Layers:
- Pour your first colored layer into a cake pan and let it chill for 10–12 minutes until just set. Repeat this process with each color, pouring over the previous layer and letting it chill in between until completed.
- Prepare the Coconut Cream:
- In a clean saucepan, mix the coconut milk, 4 g agar-agar, 40 g sugar, and a pinch of salt, bringing it to a gentle boil until the agar-agar dissolves. Take care to stir continuously for even consistency.
- Top with Coconut Cream:
- Once the coconut cream has cooled slightly, pour it over your set jelly layer and let everything cool completely in the refrigerator for at least two hours. This final touch is what brings everything together!
- Serve:
- To serve, gently loosen the edges of the jelly with a knife and carefully invert it onto a serving plate. Slice and watch guests marvel at the beautiful layers before diving in for a taste.
 Pin It
  Pin It
 This jelly cake is more than just dessert; it’s a centerpiece that brings everyone together, sparking joy and laughter as they dive into the colorful layers. It's fascinating to see how a simple recipe can transform into a cherished focal point during gatherings.
Tips for Colorful Creations
Using gel food colors allows for more vibrant layers, giving that gorgeous contrast and brightness. Always remember, the order of your colors can create beautiful visual effects—try to plan it out before pouring! Also, don’t hesitate to add fresh fruits for an extra surprise between layers.
Perfecting Your Technique
Angles matter when layering, so pour gently down the side of the pan for a cleaner fit. Also, you might find that different sautés or fruits can change the experience, so have fun with it! Play with textures and tastes; the best part of cooking is letting your personality shine through.
Final Thoughts for Success
This jelly cake can become a canvas for your creativity—let your imagination run wild! Always remember to enjoy the process and the smiles that come with sharing your delicious creations.
- Don’t rush the setting times for the best results.
- Test out various fruits and juices to see what works for you.
- Capture the moments as you create; they might just become your favorite memories!
 Pin It
 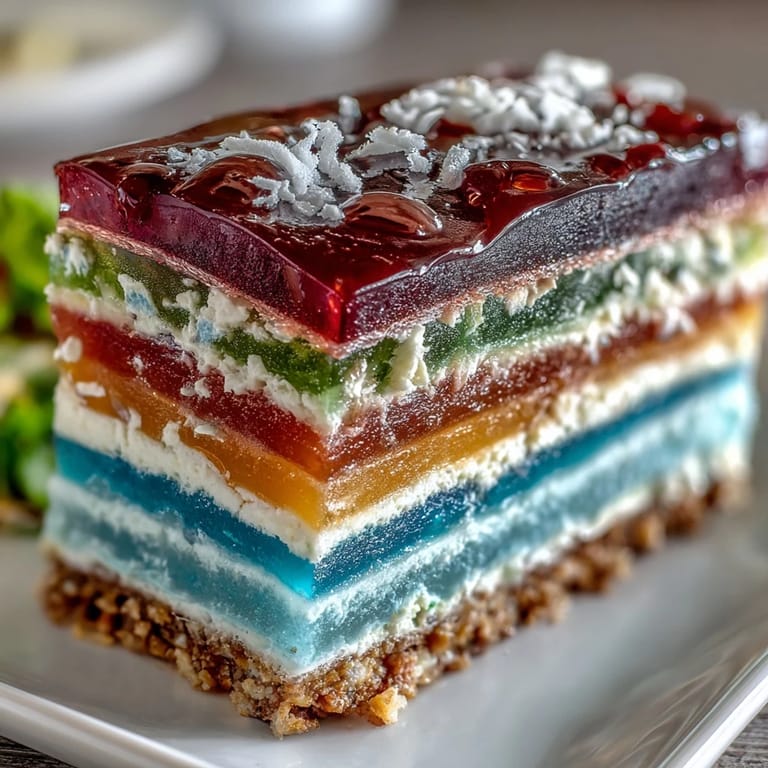 Pin It
 As you gather around to enjoy this colorful dessert, remember that it's not just about the food but the memories and laughter shared while making it. Here's to many sweet moments ahead!
Recipe FAQs
- → Can I use different flavors for the jelly?
Absolutely! You can use various fruit juices instead of food coloring to enhance the flavors of each layer.
- → How long does the cake take to set?
After pouring the final layer, allow it to set in the refrigerator for at least 2 hours for optimal texture.
- → Is this dessert suitable for children?
Yes, the vibrant colors and fun textures make this dessert appealing to children.
- → What can I replace coconut milk with?
You can substitute any plant-based milk if you prefer, but be sure to adjust the sweetness accordingly.
- → Can I add fruit to the layers?
Yes, adding diced fruit between layers will provide extra texture and flavor variation.