 Pin It
 My neighbor Maria taught me this recipe on a warm Tuesday evening when I had nothing but chicken breasts and a jar of pesto in the fridge. She walked me through the breading process with such confidence, her hands moving quickly through flour, egg, and breadcrumbs like it was second nature. The sizzle when the first cutlet hit the hot oil filled my kitchen with the most incredible aroma. By the time we sat down to eat, I understood why she made this at least twice a week. It became my answer to busy nights when I wanted something that felt special without the fuss.
I made this for my brother and his kids one Friday night, and they devoured every last bite, scraping the pesto off the plate with their forks. My niece, who usually turns her nose up at anything green, asked if she could have the recipe to make for her friends. Watching her carefully write down each step in her notebook reminded me how food has a way of bringing people together, even the pickiest eaters. That night, it stopped being just dinner and became something we all looked forward to making again.
Ingredients
- Boneless, skinless chicken breasts: Pounding them to an even half inch thickness ensures they cook quickly and stay juicy, plus it makes the breading stick better.
- Eggs and milk: This mixture acts like glue, helping the breadcrumb coating adhere so you get that satisfying crunch in every bite.
- All purpose flour: The first layer that dries the chicken surface just enough for the egg wash to cling properly.
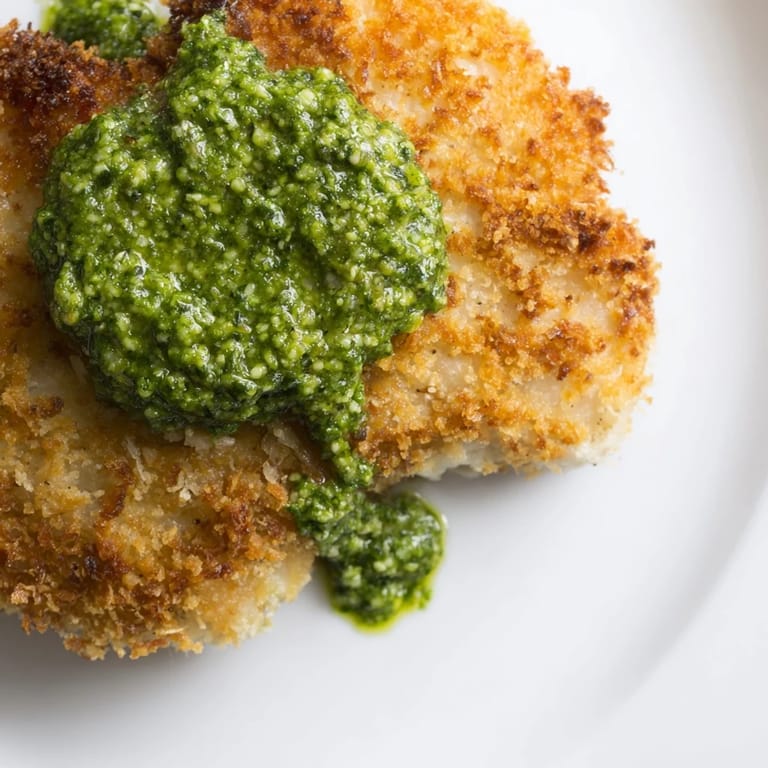
- Panko breadcrumbs: These Japanese style crumbs are the secret to achieving that extra crispy, airy texture that regular breadcrumbs just cannot match.
- Grated Parmesan cheese: It adds a salty, nutty richness to the crust and helps it turn a beautiful golden brown.
- Dried Italian herbs: A small addition that brings a subtle aromatic layer, though you can skip it if you are in a hurry.
- Olive oil: Use enough to generously coat the bottom of your skillet so the cutlets fry evenly and develop that gorgeous color.
- Basil pesto: Whether you make your own or use store bought, this vibrant sauce is what ties the whole dish together with its fresh, garlicky punch.
- Fresh basil leaves and lemon wedges: Optional but highly recommended for a pop of color and a bright, zesty finish.
Tired of Takeout? 🥡
Get 10 meals you can make faster than delivery arrives. Seriously.
One email. No spam. Unsubscribe anytime.
Instructions
- Season the Chicken:
- Sprinkle both sides of each chicken breast generously with salt and freshly ground black pepper. This simple step builds flavor from the inside out.
- Set Up Your Breading Station:
- Arrange three shallow bowls in a row: flour in the first, beaten eggs mixed with milk in the second, and panko combined with Parmesan and Italian herbs in the third. Having everything ready makes the process smooth and keeps your hands from getting too messy.
- Coat the Cutlets:
- Dredge each chicken piece first in flour, shaking off any excess, then dip it into the egg mixture, letting the extra drip off. Press it firmly into the panko Parmesan blend, making sure every inch is covered for maximum crispiness.
- Heat the Oil:
- Pour olive oil into a large skillet and warm it over medium high heat until it shimmers slightly. You want it hot enough that the chicken sizzles the moment it touches the pan.
- Fry Until Golden:
- Cook the cutlets in batches to avoid crowding, about three to four minutes per side, until they turn a deep golden brown and the internal temperature reaches 165 degrees. Transfer each finished piece to a paper towel lined plate to drain any excess oil.
- Add the Pesto:
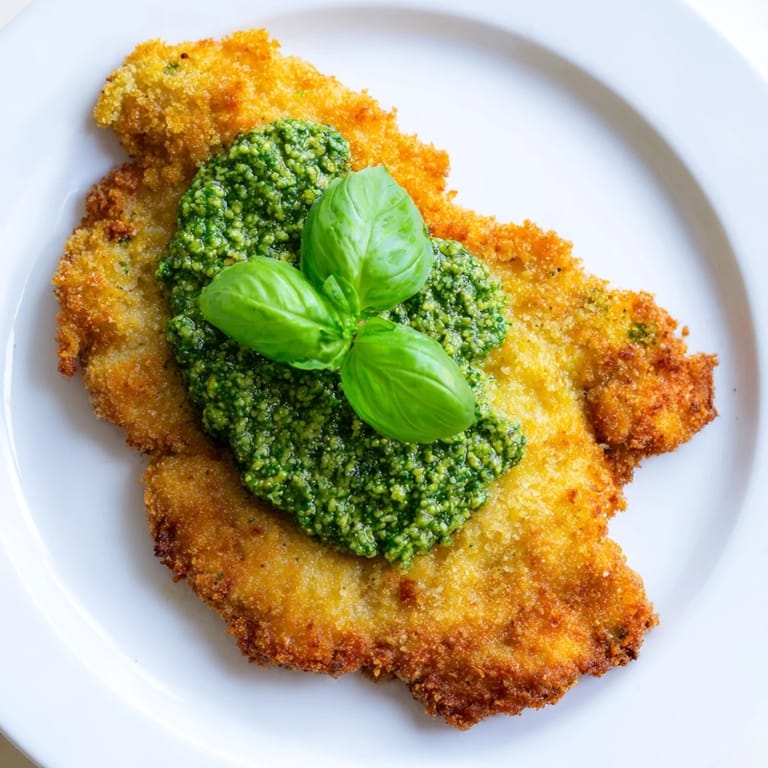
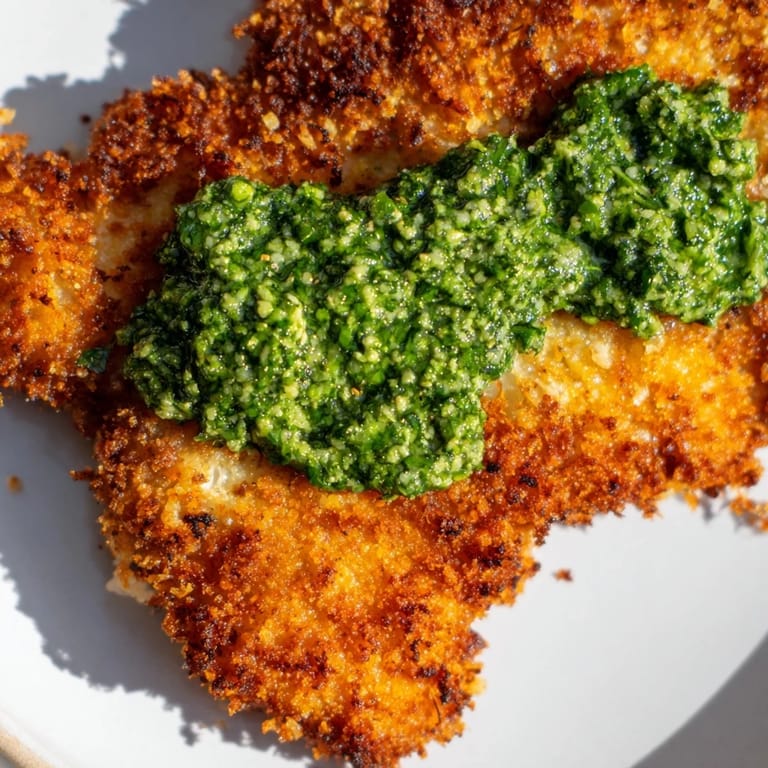
- Arrange the crispy cutlets on a serving platter and spoon a generous dollop of basil pesto over each one. The warmth of the chicken will release the pesto's aroma beautifully.
- Garnish and Serve:
- Scatter a few fresh basil leaves on top and tuck lemon wedges around the platter for anyone who wants a citrusy squeeze. Serve immediately while the crust is still at its crispiest.
 Pin It
 One Sunday afternoon, I served these cutlets with a big bowl of arugula salad and a chilled bottle of Pinot Grigio, and my friend Sophie declared it her new favorite meal. She took a photo before we even started eating, the golden chicken glistening under the pesto, and later told me she had been craving it all week. That simple moment of her excitement reminded me why I love cooking, how a dish made with care can linger in someone's memory long after the plates are cleared.
Serving Suggestions
These cutlets shine alongside a crisp green salad dressed lightly with lemon and olive oil, letting the richness of the chicken take center stage. I have also served them over a bed of angel hair pasta tossed with a little butter and Parmesan, turning them into a heartier meal. For a lighter approach, pair them with roasted vegetables like zucchini, bell peppers, or cherry tomatoes. A glass of chilled white wine, especially something bright like Pinot Grigio or Sauvignon Blanc, complements the pesto beautifully and balances the crispy, savory crust.
Storage and Reheating
Leftover cutlets can be stored in an airtight container in the fridge for up to three days, though the crust will soften a bit. To bring back some of that crispiness, reheat them in a preheated oven at 180 degrees Celsius for about 10 minutes rather than using the microwave. I have even sliced cold cutlets and tucked them into sandwiches with fresh greens and a smear of mayo, which makes for an excellent next day lunch. If you want to freeze them, do so before adding the pesto, and they will keep well for up to two months.
Variations and Substitutions
If you cannot find panko, regular breadcrumbs work fine, though the texture will be slightly less airy. Turkey cutlets are a great substitute for chicken and cook just as quickly with the same delicious results. For a gluten free version, swap the flour and breadcrumbs for gluten free alternatives, and check that your pesto does not contain any hidden gluten. You can also experiment with different pestos, like sun dried tomato or arugula, to change up the flavor profile entirely.
- Try adding a pinch of red pepper flakes to the breadcrumb mixture for a subtle kick of heat.
- Use freshly grated Pecorino Romano instead of Parmesan for a sharper, saltier crust.
- Serve with a squeeze of fresh lemon juice right before eating to brighten every bite.
 Pin It
 This recipe has earned a permanent spot in my weeknight rotation, and I hope it does the same for you. There is something deeply satisfying about pulling off a meal that looks and tastes this good with so little effort.
Recipe FAQs
- → How thin should I pound the chicken breasts?
Pound the chicken to about 1/2-inch thickness. This ensures even cooking and allows the chicken to cook through quickly while the exterior becomes golden and crispy.
- → Can I prepare the breaded cutlets ahead of time?
Yes, you can bread the cutlets up to 4 hours ahead. Refrigerate them on a parchment-lined plate uncovered until ready to cook. This also helps the coating adhere better during frying.
- → What's the best way to keep cutlets crispy?
Use panko breadcrumbs instead of regular breadcrumbs for extra crispiness. After frying, drain on paper towels immediately. Serve within 10-15 minutes for optimal texture.
- → Can I bake these instead of pan-frying?
Yes, bake at 400°F (200°C) for 15-18 minutes until golden and cooked through. While pan-frying creates superior crispness, baking is a lighter alternative that still yields good results.
- → What are good side dishes to serve with this?
Pair with a simple arugula salad, roasted vegetables, or al dente pasta tossed in olive oil. A crisp Pinot Grigio wine complements the flavors beautifully.
- → How do I know when the chicken is cooked through?
The internal temperature should reach 165°F (74°C) when measured with a meat thermometer at the thickest part. The exterior should be golden brown and the juices should run clear.